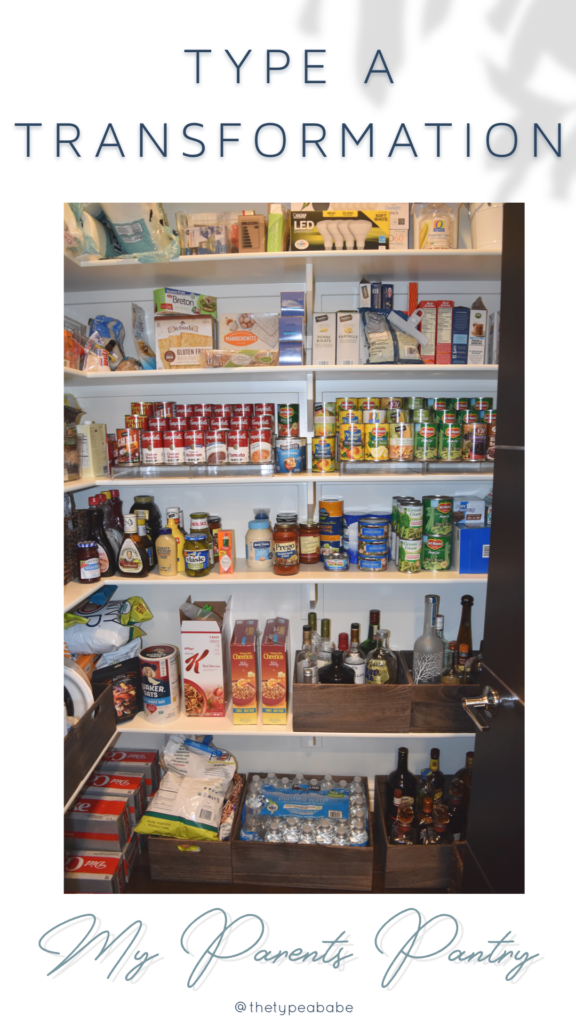
I used to get such anxiety walking into my parents pantry. At quick glance, many would have thought it was organized. But after spending 10 minutes looking for a spice or buying green beans again for the 5th time that we already had, I knew I had to change it. So, I decided to tackle what The Home Edit calls the most difficult space. And I can say looking back at the experience it was one of the biggest projects I have tackled to date.
Prep
Think about how you use the space
One of the things you should always do first is think about how you want to use the space and what your pain points are. When looking at a pantry, think about how easy it is for you to find something. When you are looking for crackers where do you look? Can you see everything that you have?
I had a lot of frustrations with the pantry. But when I thought about how to best organize it, I really took some time to think about what my main issues were. One major one was that I couldn’t see everything. Things like cans and spices were three deep and it was hard to see the stuff in the back!
So, given this I knew that I wanted some tiered storage in the space. That way, I could see all of the items that we had, so finding something would be a breeze.
Take some time at the beginning to start thinking about storage solutions. I am a lets get it all done at once person, so I wanted to make sure I had the container options on hand when I actually went about organizing, so I really took some time to think about possible solutions for the space and what I would love to see.
Measure the space
The first thing I did once I decided to tackle this project was to measure the space. I was familiar with what was stored there, and has an idea of what types of containers I wanted to get. So, I measured each shelf, the floor, and heights between the shelves, and even some of the items my parents had.

I then used these measurements to shop for products. Since I had this already done, I knew what size bins the shelves needed, how deep the tiered storage could be, or the max height of each shelf for the height of the container. Knowing these measurements made the process of buying containers super easy, and it ensured that I wouldn’t buy anything that wouldn’t fit in the space!
Getting Down to Business
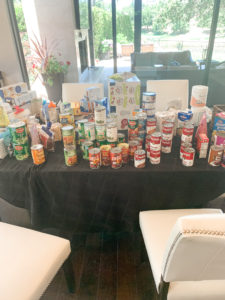
Take Everything Out
As I have said in previous posts, the first action item when transforming a space is to take everything out of it. Clean out the space and check to see what you have. Then, review to see what you want to actually keep.
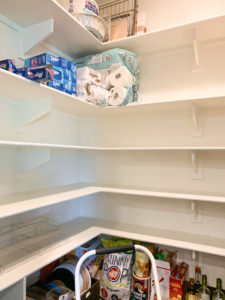
My parent’s pantry had a lot of stuff. Look at the picture of it, its truly the size of a walk in closet! So this was the most difficult part of the process for me. I sat with my mom and we took out everything shelf by shelf and reviewed what she had, getting rid of anything expired or extra that she knew she wasn’t going to use.
One thing I like to do during this process is group like items together. For example, we put all of the spices together in one spot, the cans went on another table, and the oils and such when on the counter. That made going through things easier and also makes the reinstallation process going smoother.
Clean
Once everything is out of the space, its time to clean. This may seem annoying, but how gross would it be to put stuff back on top of a large pile of dust. Gross.
For the pantry, we cleaned off the shelves with an all-purpose cleaner as well as vacuumed the floors and shelves to make sure all of the dirt was gone. I even went the next step and did some color repair on the wood floors since they had been scratched by soda containers and the stool. Also, I cleaned off the products that we had taken out of the pantry. I don’t know how, and I don’t want to know how, but the spices were all super dusty and sticky, so I went through and cleaned each one to get rid of the grime.
Trust me, having a sparkling clean space will only make moving everything back in that much more rewarding!
Installation Time!
Now is the fun part, putting it all back together! While this will vary by space, here are some things I did during this pantry install.
Alphabetize
One of my biggest frustrations before with the pantry was that it was impossible to find the spices I needed. So, I wanted to make sure this was solved after this process. I decided to do two things to ensure this.
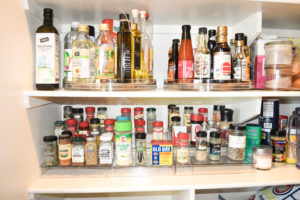
First, I put all of the spices on a tiered rack. That way I could see all of the items at once. Spice bottles tend to be the same shape and size, which is aesthetically pleasing, but frustrating when you are trying to find one spice in a sea of identical containers.
Second, I alphabetized the spices. When I was putting the spices back into the pantry, I sorted them by letter and made sure to put them into the pantry in order. That way, not only could you see everything, but you knew generally were to look. Want cumin, it’s on the left. Want Pepper, it’s on the right!
Color Code
My OCD hated the cans before I did this project. Looking into the pantry and seeing a pile of cans randomly strewn across the shelf gave me hives. So, I knew I had to change this.
And in comes the ever amazing ROYGBIV! After I got a tiered rack for the cans and had it all set up, I organized the cans when they were out of the pantry by color. Then, I went color by color in put them onto the shelf.
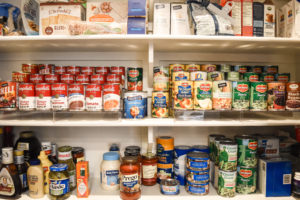
When I came across multiple items with the same colors and branding, specifically Campbells soups, I organized those alphabetically as well, lumping like flavors together. I also kept like items together, so all of the peaches were next to each other and then the pears were together next.
Containers for Like Items
The floor was an interesting space in my parents pantry. There was a bunch of soda and drinks stored on the ground mainly, but then over on the right there was a rats nest of alcohol bottles. It always looked so messy to me, so I wanted to contain them better and do it in a stylish way.
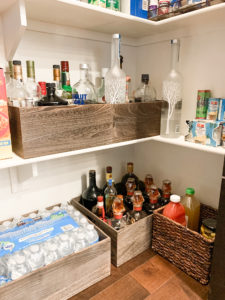
I made sure to buy some large, dark wood bins for the floor to help corral these bottles. They were mainly things we use for guests, it didn’t matter that they were in a back corner. Putting the bottle in these boxes looks much cleaner when you just look into the pantry, and also prevents someone from accidently knocking a bottle over and breaking it while reaching for something else. I’m totally not speaking from experience….
That’s it! While it took 5 hours to do, having the pantry organized and pretty is so amazing. Being able to walk into the kitchen and not have a minor stroke looking at a mess of cans or spending 30 minutes looking for a particular spice is so amazing. Hopefully these tips will help you tackle your pantry!
Does your pantry need organizing? Let me know below!